Showing posts with label embroidery. Show all posts

Friday, August 24, 2007

Here comes another one

just like the other one.


I tried another new stitch here, the red around the rocketship but I can't remember the name of it and supreme laziness is preventing me in going downstairs to look it up.

-A

Sunday, August 19, 2007

Navy Rocketship

One of a couple custom orders I received for this shirt. I tried a new stitch around the rocket, a cross-blanket stitch.


-A

Sunday, July 08, 2007

Wedding Gift

I wanted to do something traditional for my friends' wedding gift and decided on embroidered pillowcases. They turned out nicely but I completely underestimated the time this project would take (hence the lack of posts the past few weeks). This project represents Seasons One and Two of Weeds, and almost the entire audiobook of Stiff: The Curious Life of Human Cadavers.


Stitches used: split, satin and backstitch.


Hmm.. no wrapping paper, tied with a ribbon and something embroidered inside? I wonder who this is from?!?


-A

Saturday, June 02, 2007

This Week's Work

A couple bibs and placemats:


A pencil crayon roll. I love the ribbon used for the tie, it is marked like a measuring tape.


and another cross stitch for my friend, this one is based on a Subversive Stitching pattern.


Any suggestions what to do with this old piece of embroidery I found? I really like it, but am not sure what to make with it. The stitching is about about 6"x 6" and it was made from a vintage pattern.


-A

Sunday, May 27, 2007

Tidbits from the Weekend

I finished the embroidery piece I was working on and sewed it into a bib, along with 2 other bibs:


I also did a tiny cross stitch for a friend, this is just 1" x 1.25".


I was sorting through some old craft materials given to me by my MIL and her mother, and found these sweet embroidery patterns. I can't wait to use them, maybe on a clothespin apron. I love using my clothesline now that the weather is warmer. I do think though that you must get more sentimental when you get older because 10-15 years ago I'd probably rather wade in pirahna-infested water than wear embroidered kittens on anything.


-A

Friday, May 25, 2007

Baby Blue Onesie

A onesie for a gift for an online friend who just had a baby. I have been wanting to try monochrome colour embroidery for a while and really liked the blue on this onesie so used a matching colour of thread. The pattern is a vintage pattern from http://needlecrafter.com/.


Stitches used: split stitch, french knot and lazy daisy.


-A

Wednesday, May 23, 2007

Baby Gift


My Wednesday tennis instructor is obsessed with tweety bird..so I made a tweety bird snap T for her baby due in the Fall. As well as a wrap. Melissa

Thursday, April 26, 2007

Tuesday, April 03, 2007

Happy Birthday Shirt

A happy birthday shirt for my DS who turned 3. It's embroidery but I am hoping next year I can make him a screen-printed one.


-A

Embroidered Bibs

Two bibs with vintage embroidery patterns.


-A

Monday, December 11, 2006

Dragon and Christmas Embroidery

Two teatowels I made last year. The reindeer is clipart and the bunny is from a set of vintage patterns I bought on ebay.


Baby onesie:


Next on the embroidery schedule are these elves from Wee Wonderfuls.


-A

Wednesday, December 06, 2006

Shadow and a Bee Block

So it turned out Sonic was a big hit, and I got a request for Shadow the Hedgehog for Christmas.


I also put some of my fabric scaps to use before my scrap drawer exploded. (If you're looking at the photo mystified, it's a baby toy.)


-A

Tuesday, November 28, 2006

Assorted Gifts and Crafts

Quilted christmas wallhanging. Quilting requires patience and precision, so I don't do much of it. Look at my loops, they are crazy lopsided and I will have to include that specific stick with the gift to make sure it hangs straight.


I whipped up another bag out of the remnants. I always request or purchase extra fabric in case I make a mistake and then if it all works out I have remnants to play with.


Embroidered bear bib. It has the sweetest blue, white and red Red Riding Hood print on the back, but I couldn't get a nice picture of it.


-A

Saturday, November 04, 2006

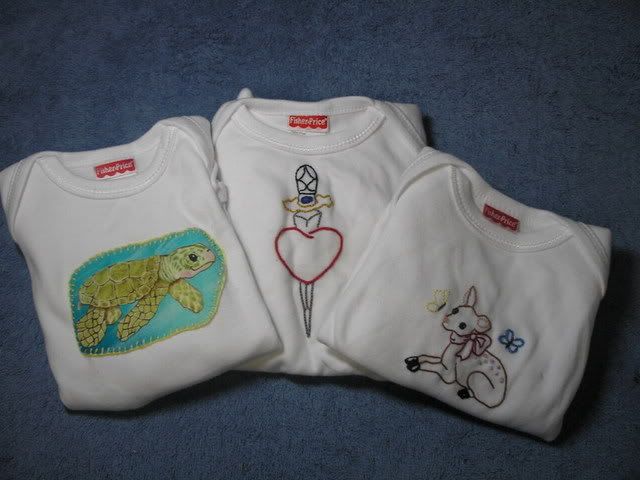
Oh embroidery, how I love you.

Click to see larger (my new HTML trick).


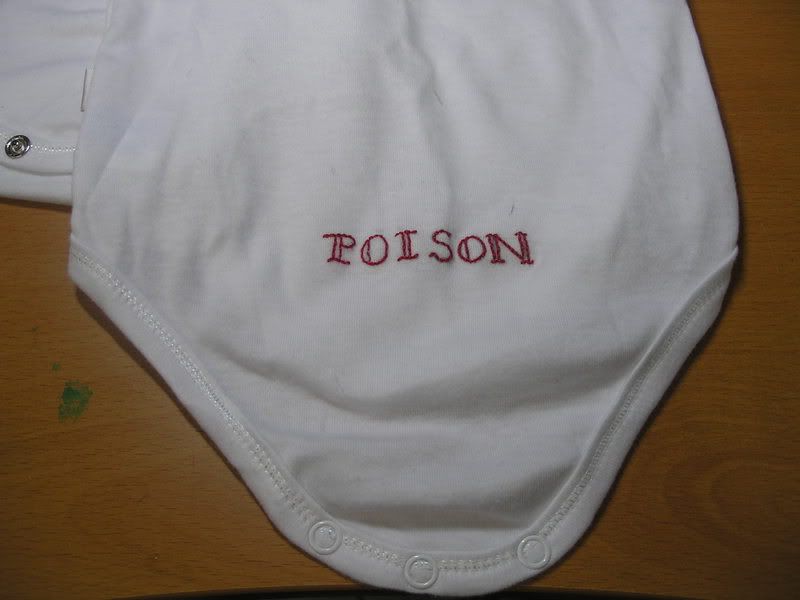
And the bum of the heart and dagger one:


Also in the works: many bags.

-Amanda

Sunday, October 29, 2006

Halloween + Felt Pt II

Our halloween tree. A little out of context in this photo, but imagine it in a bay window with some ghosts hanging above it and jack o'latterns surrounding it, it looks pretty cool.


Here is a close-up of the ornaments on it:


I used some of that green foamy stuff for flower arrangements in a tin pot, covered the foam with the fake cobweb material (which got a bit mussed up by a toddler who tried to EAT it) and then tied a halloween ribbon around. For that country touch?? Actually I am not sure why I did that, perhaps I am getting brainwashed by craft magazines.

Sunday, October 22, 2006

Embroidered Hoodie

I made this for a friend's 3 year old


Close up of embroidery (from a vintage iron-on)

Saturday, August 19, 2006

Bib Tutorial

Materials:

Front material (I used a piece of embroidery)
Padding- preferably something absorbent like terrycloth
Back material
Bias tape
Needle and thread or sewing machine

If you are using a piece of embroidery wash it first


Cut out a paper pattern for the size you want your bib to be. I just made one up but you can probably find patterns online or trace a bib you already have.

Pin your paper pattern to the front material, cut it out and then pin and cut out a piece for the padding and the back material.

Here I already cut out the front and padding, and am about to cut some green fleece for backing.


Pin together all 3 layers with the "good" sides of your front and backing together


Sew around the sides and bottom, leaving the neck part open


Turn inside out and pin your bias tape along the neck piece, with long ends extending on both sides to tie around the neck. Sew along length of bias tape, making sure you are sewing through all 3 layers and both sides of the bias tape.


Things I learned making this tutorial:
- don't use a piece of embroidery that took you two weeks to finish when first attempting a project where you are making up directions as you go along.
- fleece and terrycloth makes the bib a bit too thick, better to use just fleece or terrycloth with cotton on the back.
- when using a piece of embroidery it's better to have some fabric framing the piece instead of a close seam as it will look nicer.

Monday, August 14, 2006

Embroidery Tutorial

Time:
Approximately 90 minutes for this design

Materials:
-Onesie or item to be embroidered
-needle
-embroidery thread
-hoop (optional)
-design
-iron-on transfer pencil
-iron

Instructions

Step One: Draw or print your design. I drew one but online clipart can be a good source of designs as well. Some people also trace photos to make their designs

Step Two: Create your transfer pattern.

Transfer pencil- you can buy these at craft or sewing stores and they are inexpensive.


You can directly trace your pattern or you can make a mirror image if you don't want the image to be flipped when you iron it on. I made a mirror image so "harry" wasn't backwards when I ironed it on.

My original design and the transfer pencil mirrored image:


Step Three: Iron on Your Transfer- Pin the design, transfer side down. Use a hot iron (wool setting) but no steam. Lift up a corner occasionally to check your progress. If it isn't marking as clearly as you would like, go over it with the iron a little longer. Be careful not to scorch your fabric.


Me peeking to make sure my transfer is copied


Step Four (Optional): Place item into an embroidery hoop to keep fabric tight for stitching. I did needlework for years without using hoops but some people find it easier to use them.


Remember to only put the front part of the onesie in the hoop so you aren't sewing the front and back together (it's been done. I've also sewed things onto my pants accidentally. I'm so cool that way).

Step Five: Thread Your Needle
Embroidery needles have elongated eyes (the hole in the top of the needle). You could use a regular sewing needle but they are harder to thread with embroidery floss.


Embroidery floss comes in six strands. The standard is to use two strands for embroidery and cross-stitch. For daintier work, use one strand and more a thicker look use three or more. Cut a length of thread and separate the strands. Tip: if you hold the end of the threads you can pull them apart more easily, or just remove one thread at a time to prevent tangles.


The thread is numbered for kits or fancy patterns. For this kind of embroidery just use whatever colours you like. In a pinch or for fun you can substitute other threads instead of embroidery floss. I pulled apart a cloth napkin once when I ran out of white thread for a project and used the threads for embroidery. In this project I also pulled apart some yarn and used that for Harry's hair.

In embroidery you usually don't knot your thread but since I want to throw this onesie into the wash I knotted the end of my thread.

Step Six: Stitching

I began with a basic backstitch for Harry's face.


At the end I want another knot to make sure my thread isn't going to come out in the wash. To make a knot at the end it's easiest to go under a stitch or two you've done and then go through the loop to secure it to the fabric.


Twenty minutes after I started stitching I have this- Harry's face, mouth and scar


I wanted Harry's wand and glasses to be thicker so I used three threads instead of two and I did a split stitch

I did an algerian eye stitch in metallic thread for the tip of the wand.


I wanted his hair to be textured so I used threads I pulled from yarn. Harry's hair


Step Seven: Wash the onesie to remove the transfer pencil.

Ta-da!!